Create a restaurant QR menu
Turn your printed or PDF menu into a mobile menu with one QR code for your tables. Add dishes, photos, prices, sections and veg or spice marks — and change prices any time without reprinting.
A QR menu is one code on your table that opens your menu on the customer's phone. No app, no typing — they point the camera and it opens.
The important part is what happens afterwards. Because the code points at a page rather than at the prices themselves, you can change a price, add a special or mark something sold out, and the code already on your tables shows the new version. You never reprint because a price changed.
This guide takes about 20 minutes end to end. You do not need to be technical.
The whole thing, start to finish
That is one continuous recording of the real editor, trimmed to the parts where something happens. The rest of this page walks the same ground slowly.
See one before you build one
Here is a sample menu built exactly this way. Point your phone camera at the code, or open uyou.in/sample-food-menu on the device you are reading this on.

It holds around 130 dishes across ten sections, with photos, prices, tray prices and a green mark on every vegetarian dish. Try the section buttons and the search box, and tap a dish to see the full photo and description. That is what your customers will get, and it is the same code and link you are given in Step 7.
Only have a PDF or Word menu? Skip the typing. Email it to support@uyou.in and we will enter your dishes, prices and sections for you, free of charge. See Send us your menu at the end.
Before you start
You will get through this faster with these to hand:
- Your current menu, in any form — printed, PDF, or a photo of the card.
- Photos of your dishes, if you have them. They are optional, and you can add them later. Photos taken on a phone are fine.
- Your logo, if you have one. Also optional.
You do not need a website, a designer, or anything installed.
Step 1: Choose the Restaurant QR menu template
Sign in, open Landing Pages in the left menu, and click New page. You will see the template gallery. Pick Restaurant QR menu.
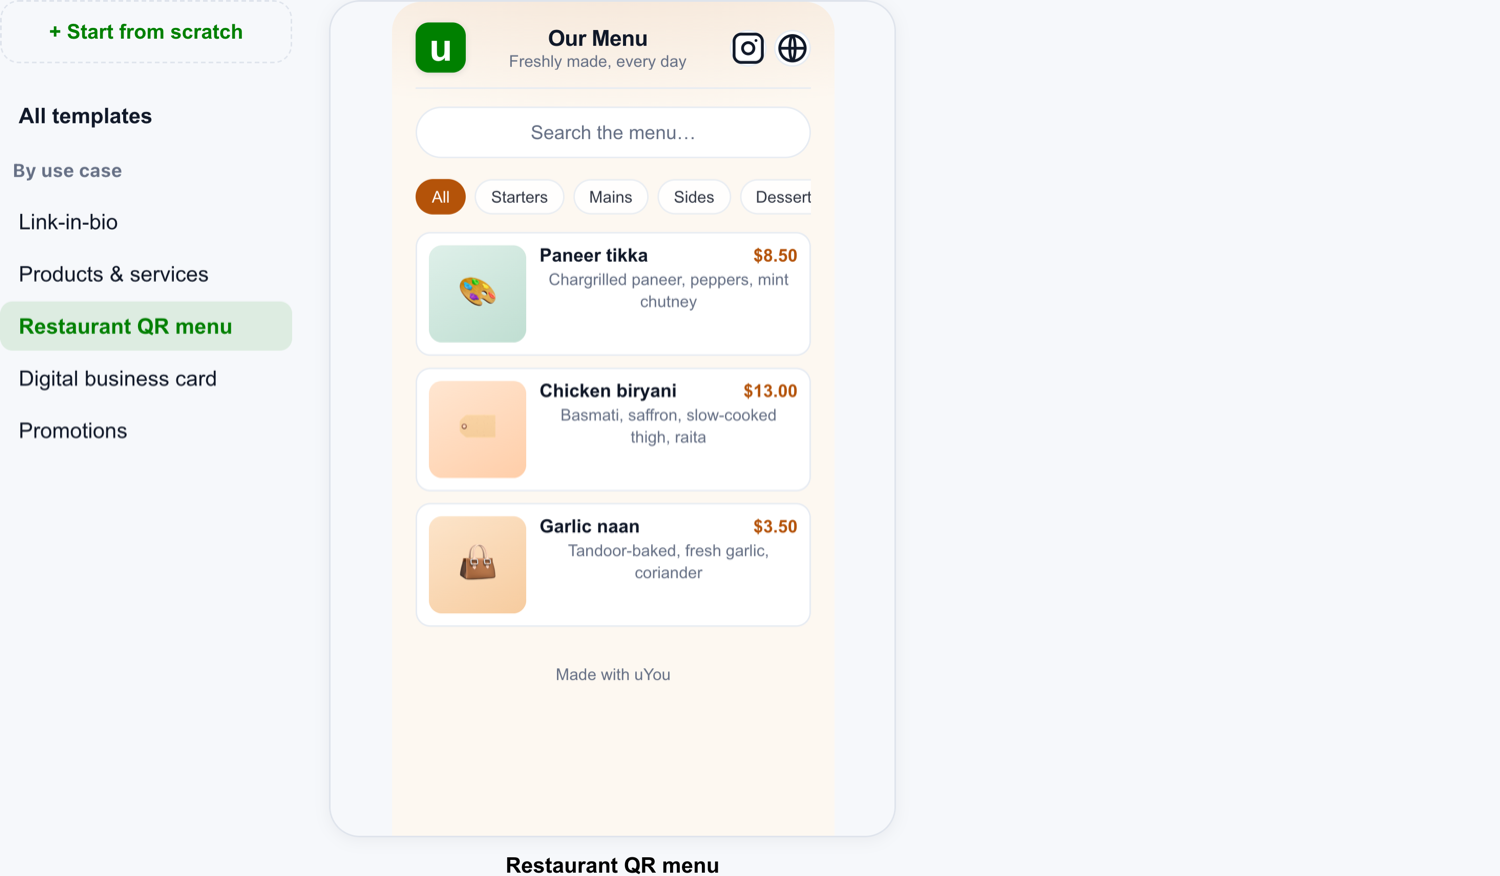
It arrives with a few example dishes and sections already filled in, so you can see the shape of it. You will replace those with your own as you go.
Step 2: Name your menu and pick your colour
The editor has two halves. On the left you make changes; on the right is a live preview of what your customers will see. The preview updates as you type, so you never have to guess.
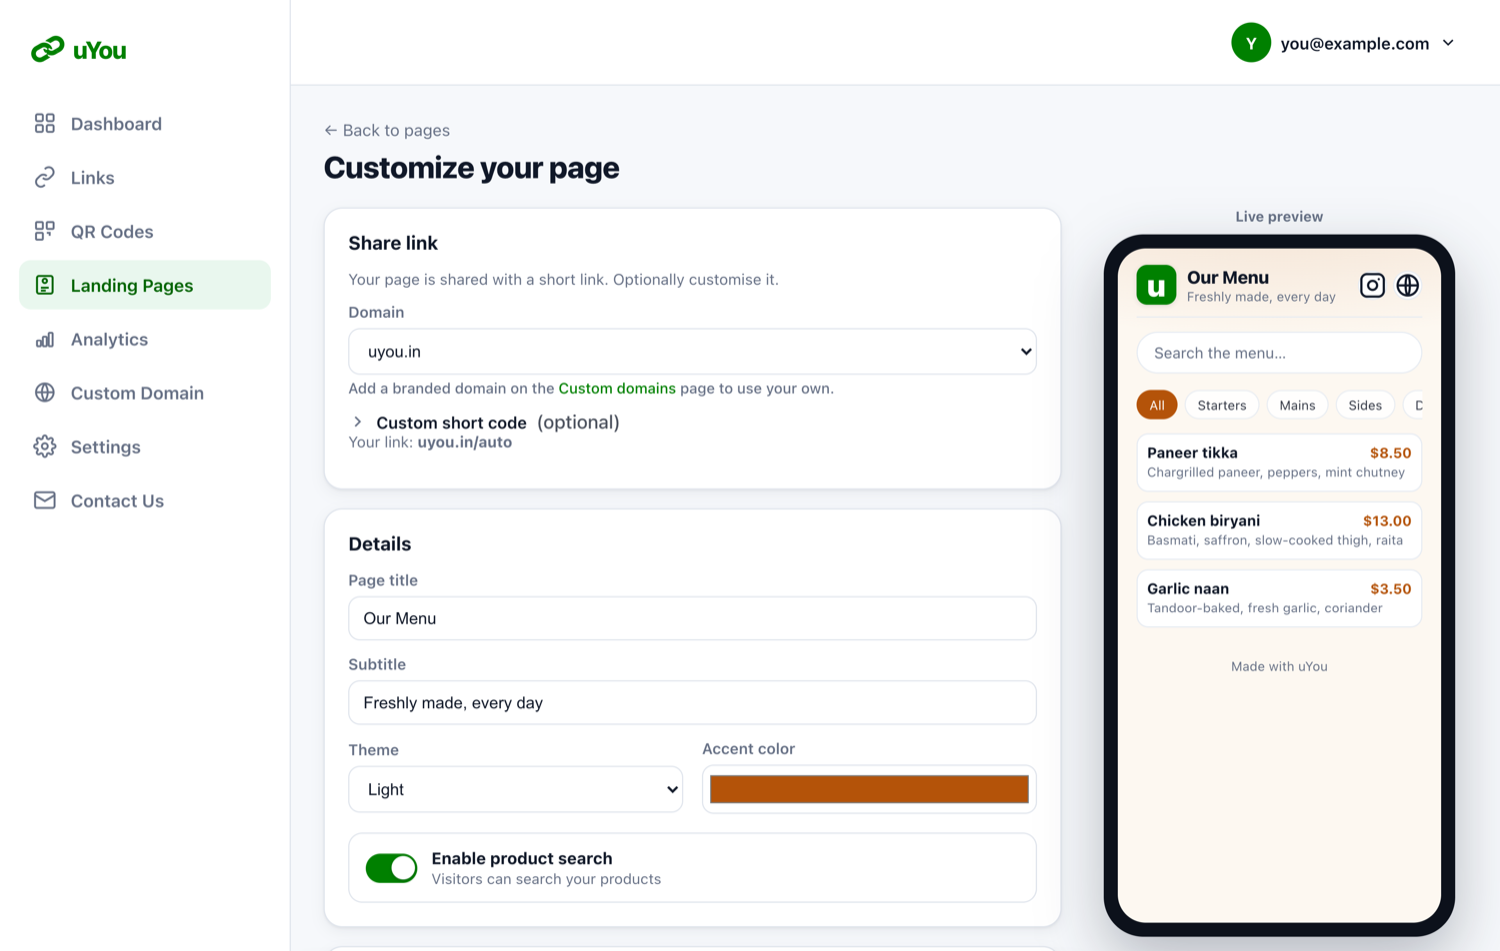
Fill in the top section:
- Page title — usually your restaurant's name, or simply "Our Menu".
- Subtitle — a short line underneath, like "Freshly made, every day". Optional.
- Accent colour — the colour used for prices and the selected section. Pick something close to your brand.
- Logo — choose Upload an image and pick your logo file. It appears at the top of the menu.
Leave everything else as it is for now.
Step 3: Add your menu sections
Sections are the groups on your menu — Starters, Mains, Desserts, Drinks. On the finished menu they become buttons across the top that a customer taps to jump to that part of the menu.
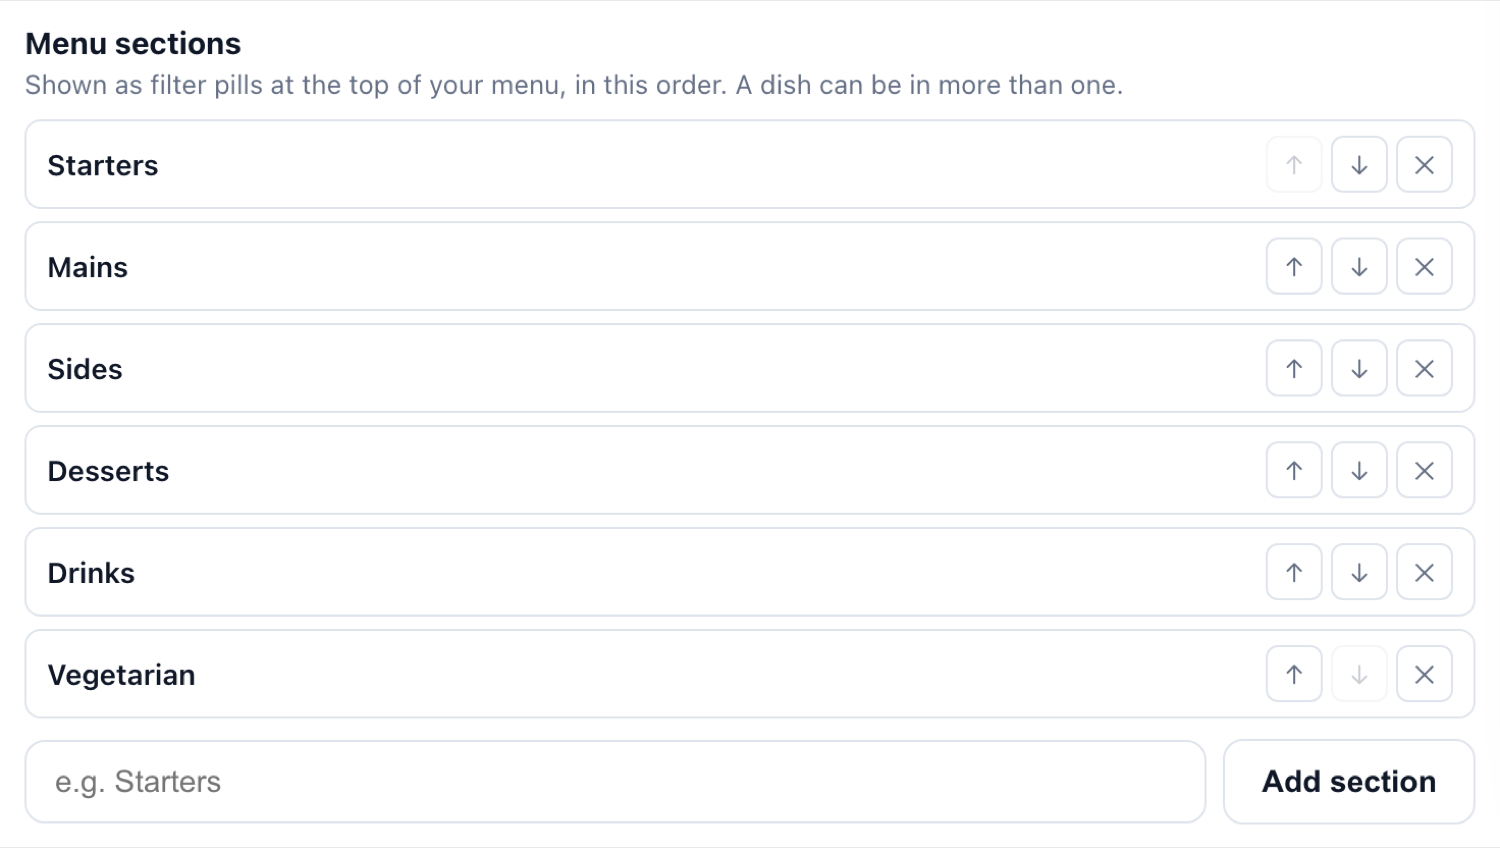
Type a section name in the box and click Add section. Add them in the order you want them shown. The arrows on the right move a section up or down; the ✕ removes it.
A tip that saves work later: as well as the usual Starters and Mains, add a section for anything customers commonly ask for — Vegetarian is the big one. A dish can sit in more than one section, so your paneer tikka can be in both Starters and Vegetarian, and it shows up whichever the customer taps.
Delete the example sections you do not want using the ✕ button.
Step 4: Add your dishes
Below the sections you will find Menu items, with the section buttons repeated above the list.
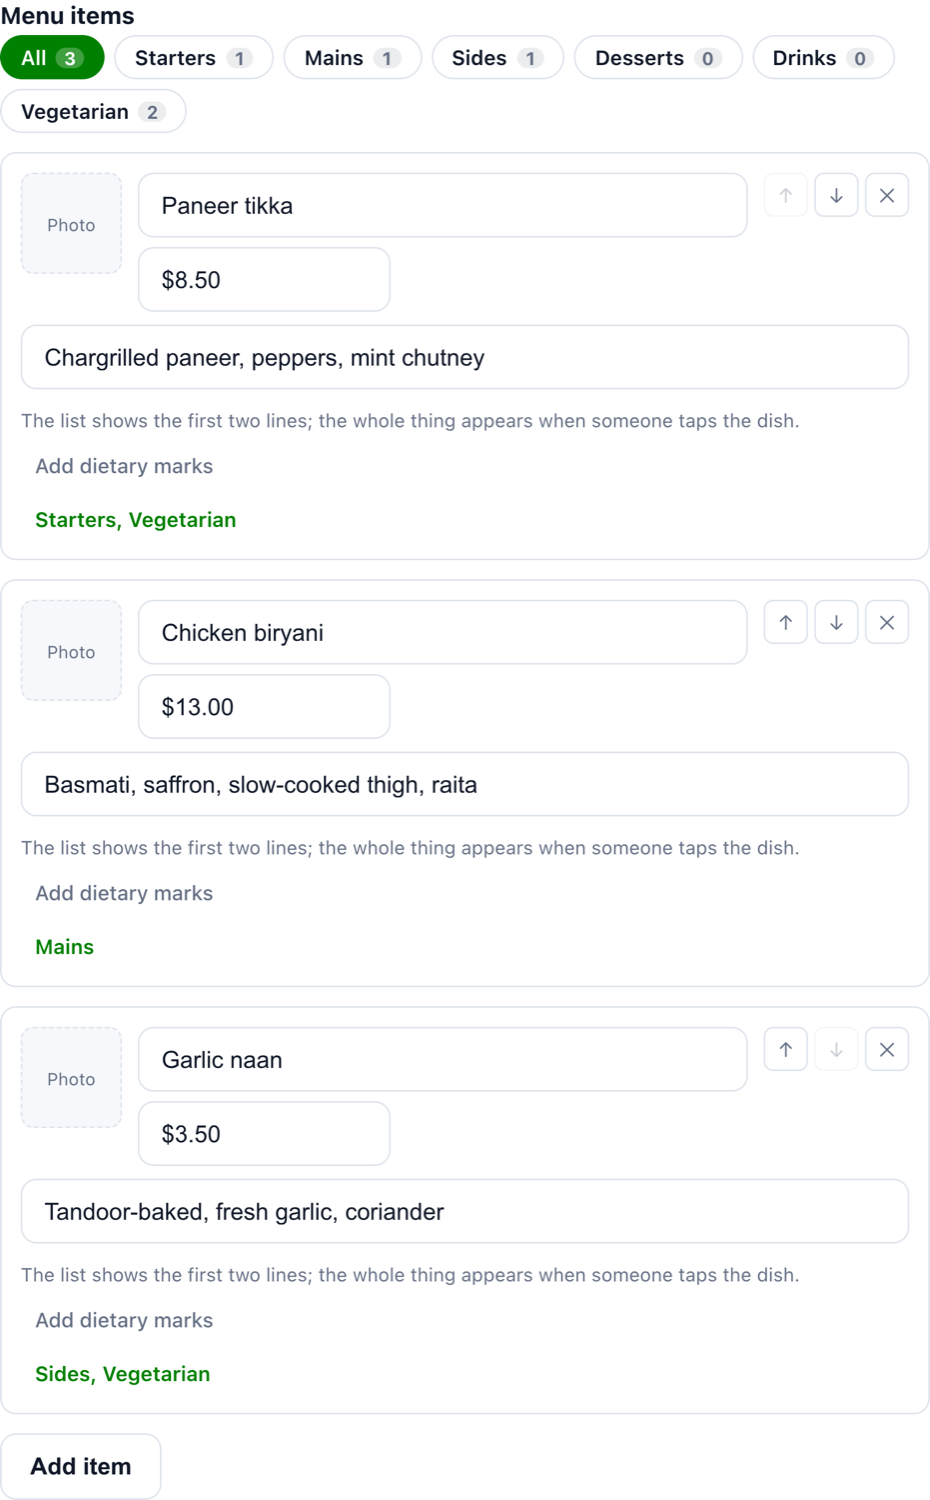
The number on each button is how many dishes are in that section — a quick way to spot one you have not filled in yet.
The easy way to work through a long menu is one section at a time:
- Click a section button, for example Starters. The list narrows to just that section.
- Click Add item to Starters. The new dish is already filed under Starters.
- Fill it in, then add the next one.
- When the section is done, click the next button and carry on.
Click All at any point to see the whole menu again.
Filling in one dish
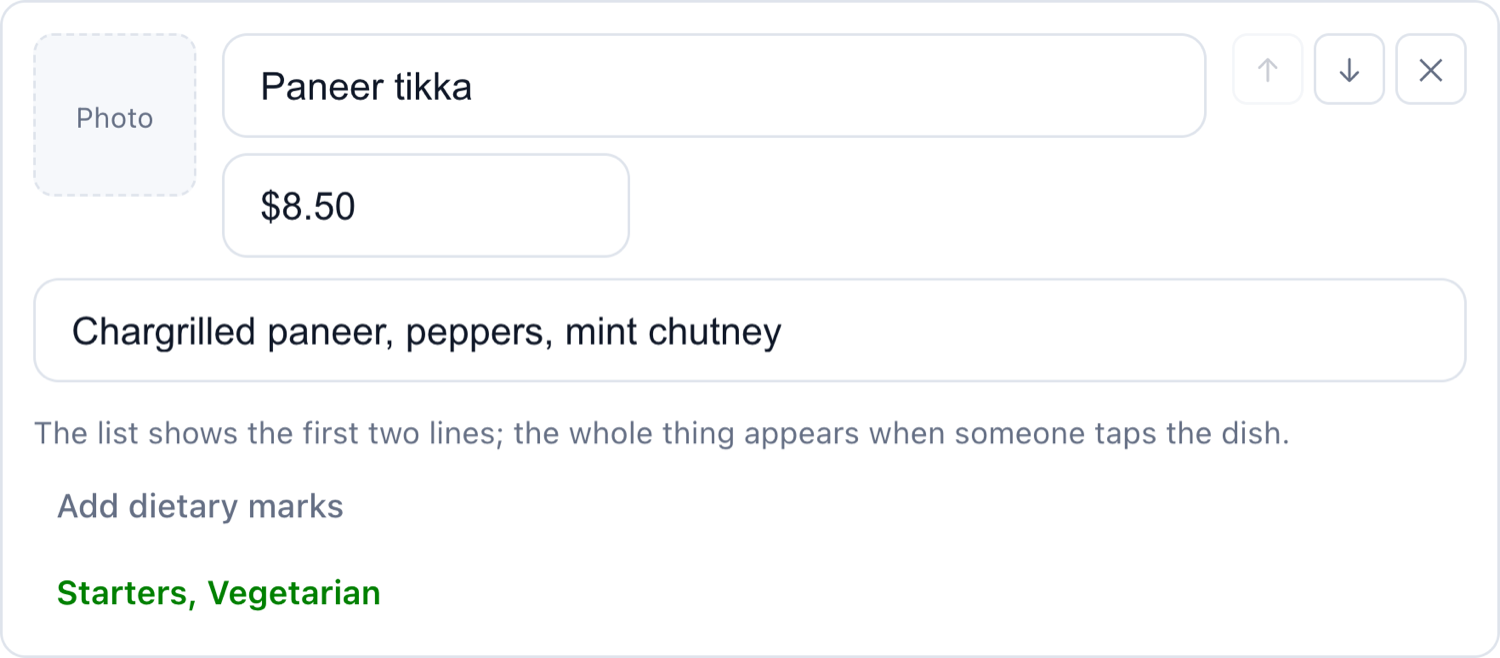
- Photo — click the grey Photo square and choose a picture. Take it from directly above the dish in good light if you can. Your phone photo is resized automatically, so a large file is fine.
- Dish name — what it says on your printed menu.
- Price — type it exactly as you want it read:
$8.50,12.50,250. It is free text, so "Market price" or "$15.99 / $17.99" for a two-size dish both work. - Description — one line about the dish. The list shows the first two lines and the rest appears when a customer taps it, so put the appetising part first.
- Sections — click Choose sections and tick every section this dish belongs to.
The arrows on the right reorder a dish; the ✕ removes it.
Step 5: Mark up your dishes
Under each dish is a line that starts as Add dietary marks. Click it and four rows open.
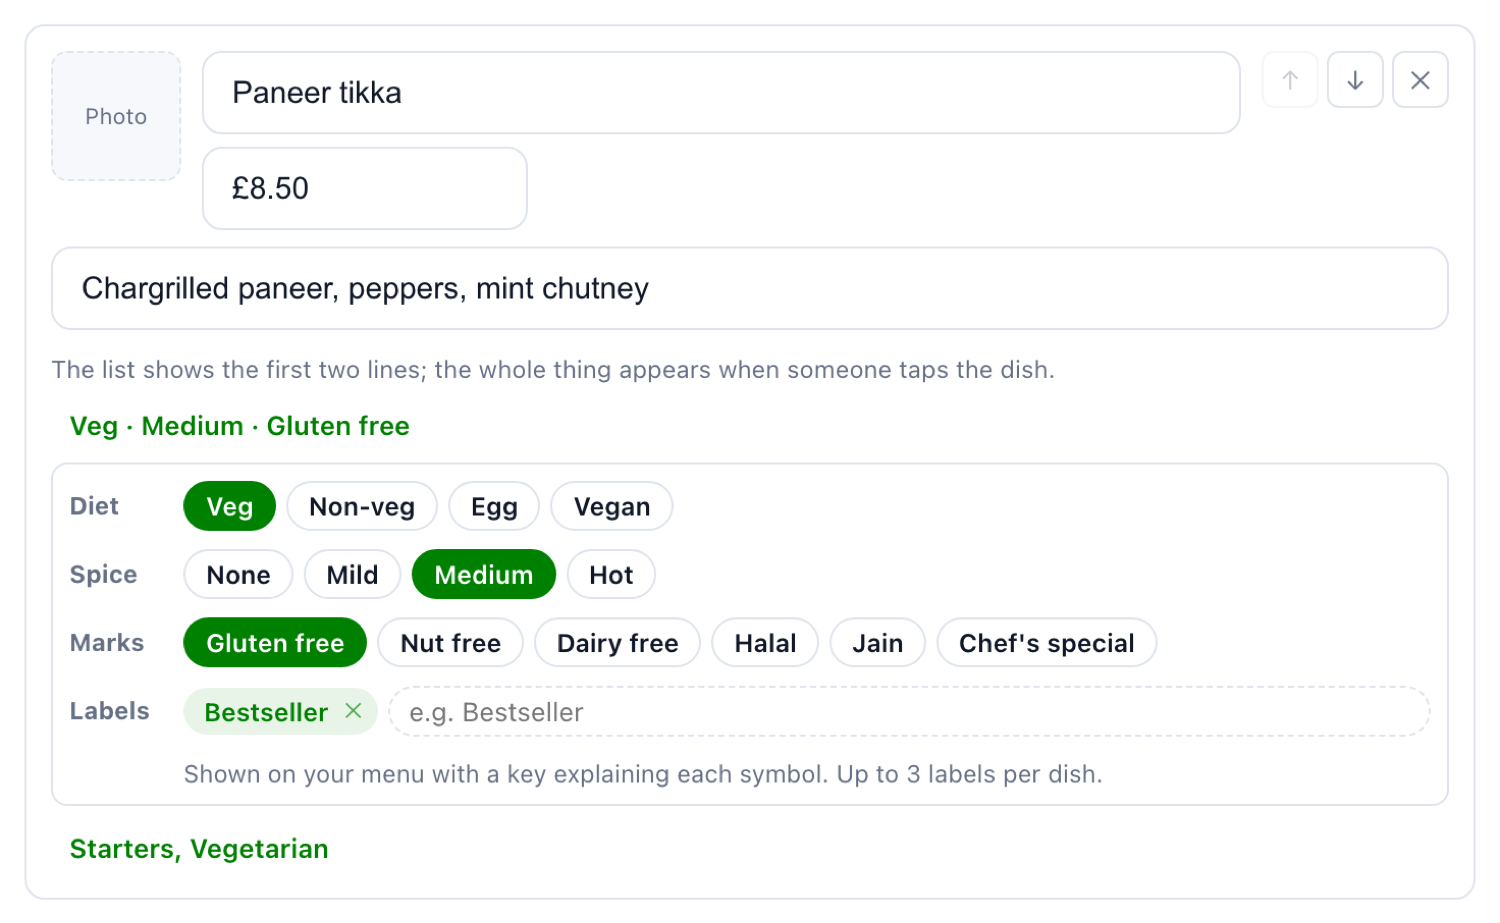
- Diet — Veg, Non-veg, Egg or Vegan. Pick one. These appear as the familiar green square and brown triangle marks in front of the dish name. In India these marks are expected on menus by law, so it is worth setting them on every dish.
- Spice — None, Mild, Medium or Hot, shown as one, two or three chillies.
- Marks — Gluten free, Nut free, Dairy free, Halal, Jain and Chef's special. Tick as many as apply.
- Labels — your own words, up to three per dish: "Bestseller", "New", "Seasonal". These appear as small tags under the dish.
Click a mark again to switch it off. Your menu automatically shows a key at the bottom explaining every symbol you have used — and only the ones you have used, so it stays short.
Step 6: Check the preview
The phone on the right shows exactly what a customer sees. Scroll it, tap the section buttons, and read it as though you were sitting at one of your own tables.
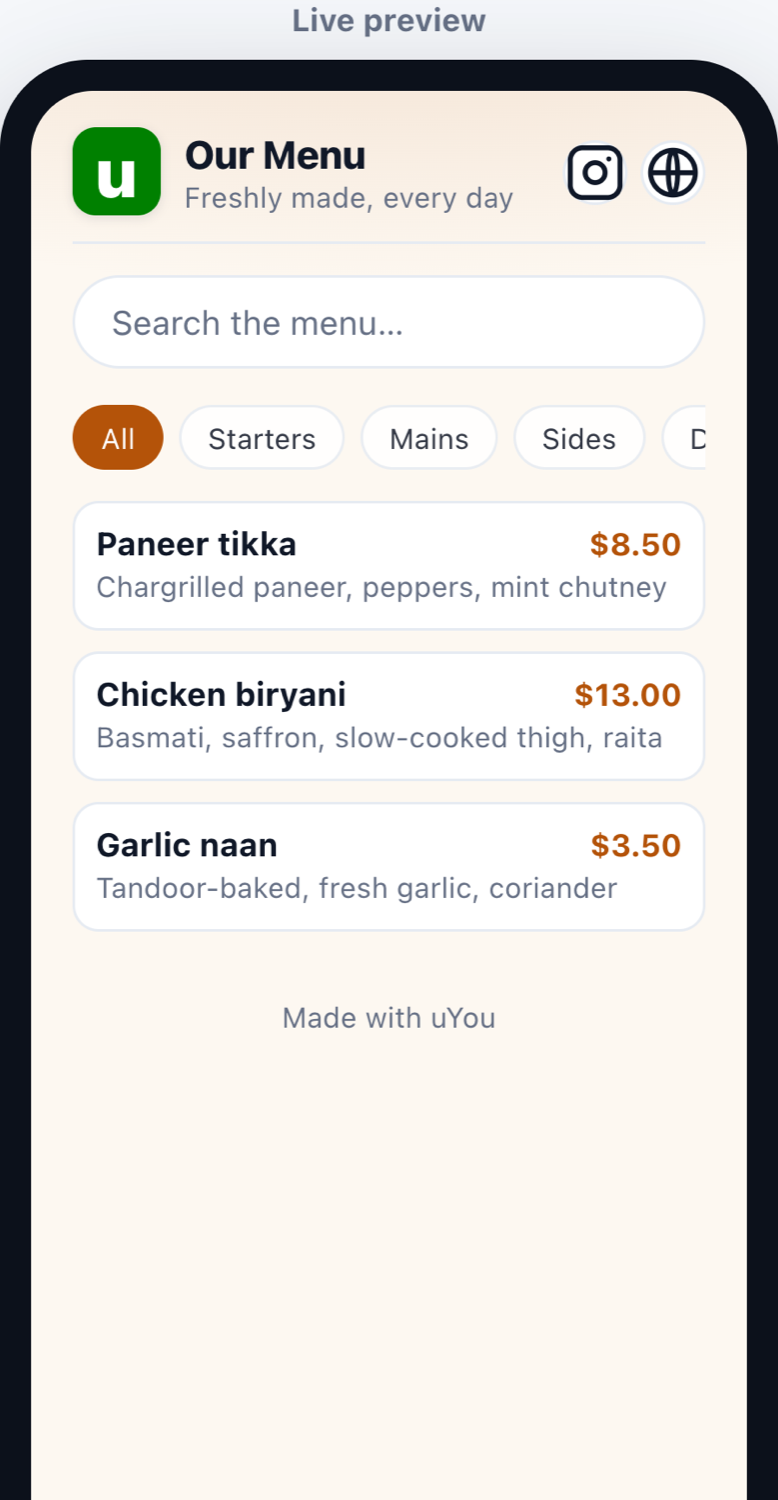
Things worth checking:
- Are prices right? This is the number one thing to get wrong.
- Is every dish in at least one section?
- Do the veg and non-veg marks match the dish?
- Does the description read well cut to two lines?
Step 7: Save and collect your QR code
Click Create page at the bottom. The Save button follows you down the screen, so it is always within reach on a long menu.
Once it saves, two things appear at the top of the page:
- Your menu's link — a short web address like
uyou.in/abc123. Put this in your Instagram bio, on Google Maps, in WhatsApp, anywhere. - Your QR code — this is what goes on the tables.
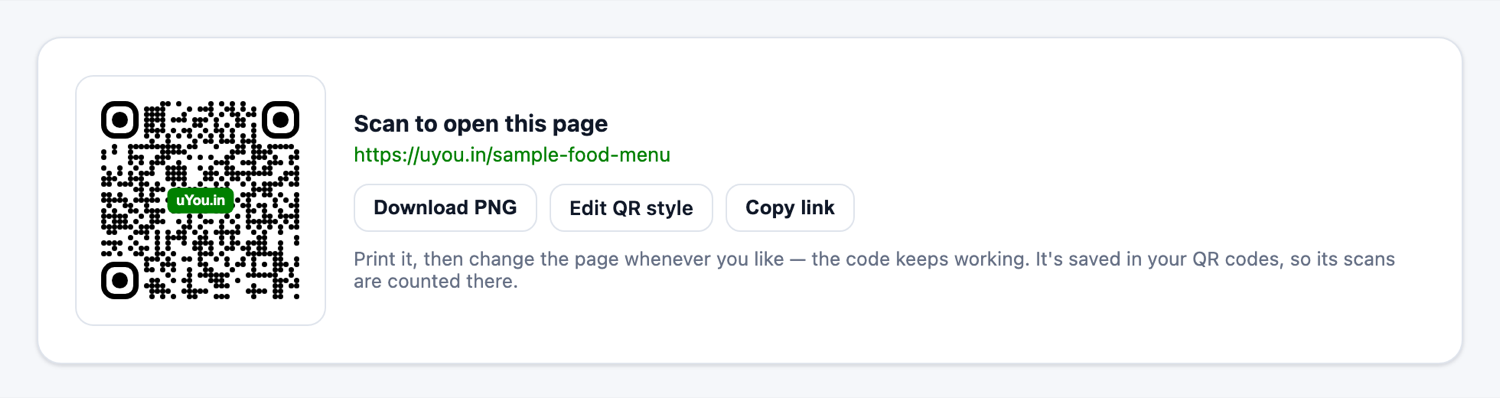
That is the real card from a saved menu. The short link under the heading is the one to share; the code beside it points at the same place, so a customer gets the same menu whether they scan the table card or tap the link in your Instagram bio.
Click Download PNG to get a high-resolution image for your printer. If you want to change how the code looks — colours, corner style, your logo in the middle — click Edit QR style and it opens in the QR editor. Restyling it never changes where it points, so a code already printed keeps working.
Your QR code is also saved under QR Codes in the left menu, where you can see how many times it has been scanned.
Printing your table cards
- Print it at least 3 cm across (about 1¼ inches). Bigger is safer — a phone struggles with a code smaller than that.
- Leave white space around it. The code needs a clear border to be found by the camera.
- Keep the contrast strong. Dark code on a light background. A pale code on a dark table card is the most common reason a QR fails to scan.
- Add a line of text telling people what it is: "Scan for our menu". It roughly doubles how many people actually scan it.
- Test it before you print a hundred. Print one, put it on a table, and scan it with two different phones.
See What size should a QR code be for print? for more.
Changing your menu later
Open Landing Pages, click your menu, make the change, and save. The QR code on your tables stays exactly the same.
One thing to know: your menu is stored on servers around the world so it loads quickly for your customers. That means a change takes a few minutes to reach everyone — by default up to 15 minutes. You will see a note telling you this when you save. If you need changes to appear faster, higher plans let you set the refresh as short as one minute.
What this is useful for day to day:
- Sold out of something? Add "Sold out" to the description, or remove the dish.
- Prices going up? Change them the night before. No reprinting.
- Seasonal special? Add a dish, give it a "New" label, remove it when the season ends.
Send us your menu and we will type it in
If your menu is a PDF, a Word document, or even a photo of a printed card, you do not have to type it all in yourself.
Email it to support@uyou.in and we will enter every dish, price, description and section for you, free of charge. Please include:
- Your menu file — PDF, Word, or a clear photo of each page.
- The email address you signed up with, so we can put the menu on your account.
- Anything we should know, such as "the Friday specials only run on Fridays".
We will reply when it is loaded, usually within a couple of working days. All you have to do afterwards is add the dish photos and check we read the prices correctly — then it is ready to print.
Common questions
Do I need a website? No. Your menu page is the website, and it comes with the link.
Will it work on an iPhone and an Android? Yes, both, using the normal camera app. No app to install for you or your customers.
Can I have more than one menu? Yes — many restaurants keep a separate lunch menu, drinks menu and dinner menu, each with its own QR code. Your plan sets how many pages you can have; see the pricing page.
What if I make a mistake after printing? Fix it in the editor and save. The printed code is unaffected — it only ever points at your page.
Frequently asked questions
Do I have to reprint the QR code when prices change?
No. The QR code points at your menu page, not at the prices. Change a price, save, and the same printed code shows the new one. You only reprint if you want a different design on the table card.
Can I use this if I only have a PDF or Word menu?
Yes. Email it to support@uyou.in and we will type it in for you, free. You then just add photos and publish.
Do my customers need an app?
No. Every modern phone camera reads a QR code. They point, tap the notification, and the menu opens in their browser.
Can one dish appear in two sections?
Yes. A dish can be in "Starters" and "Vegetarian" at the same time, and it shows under both filters.
How many dishes can one menu hold?
There is no fixed limit. Menus of well over a hundred dishes work fine — the example at the top of this page has around 130. Very long menus are easier for customers when you split them into sections.
Last updated 2026-08-29